Showing posts with label recipe. Show all posts
Showing posts with label recipe. Show all posts
Sunday, October 10, 2010
Saturday, October 9, 2010
fresh hops American pale ale, part 1
This is an American pale ale made with hops fresh from the garden. When using fresh (wet) hops rather than dried, somewhere between 4 and 6 times the quantity by weight is required. I have just enough fresh Centennial and Cascade to make what I hope will be a robustly aromatic beer.
Here's an interesting article and slide show from the NY Times about fresh hops beer and a hops farm in Salem, Oregon.
I looked to Palmer's American Pale Ale recipe from How To Brew as a starting point, as well as the Sierra Nevada Pale Ale clone recipe from BYO's May/June 2005 issue.
I probably would have gone with the recommended Wyeast American Ale if The Cellar hadn't been out. Instead I got Wyeast yeast strain 1272, American Ale II, described thusly:
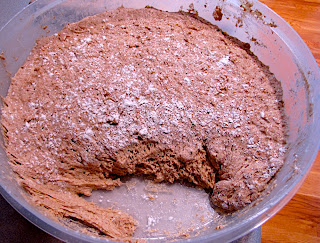
The recipe I ended up with for a 5.5 gallon batch was:

I steeped the grains for 30 minutes, starting at 170 degrees and ending at 156, in 3 gallons. I see from Palmer, page 136, that it's best to have no more than a gallon per pound, so I should have used only 2 gallons.

Refilled the kettle to 3 gallons, added the DME at 200 degrees, brought to boil, and added the bittering hops.

At 30 minutes, added the Centennial. At 45, added the LME and returned to boil. I brought the container of LME up to something over 150 degrees in a hot water bath to minimize the recovery time. At 50 minutes, added more Centennial. At 60, added Cascade. Knockout at 65 and into icy sink where I removed the hop boiling bags.

Cooled to about 90 degrees, aerated by pouring between kettle and fermenter three times, and topped off with refrigerated Crystal Geyser spring water. Mixing of wort and water was very poor, so poured off about 4 gallons into the kettle and back to the fermenter, which did the trick. Temperature was 71 degrees and volume was 5.5 gallons.
Original gravity was measured at 1.052, smack in the middle of Palmer's range of 1.045 to 1.060. That agrees very well with the calculated gravity using 22 points from the steeped crystal, 42 from the DME, and 216 from the LME, or 50.91 points per gallon, or 1.051 gravity.
Pitched the yeast and transported to the downstairs bathroom where I think it will stay at the lower end of the temperature range. After seven hours it was down to 68 degrees, with no noticeable activity.
Next time, I need to drain the hops bags into a sanitized bowl. There was 8 or 12 ounces of wort that didn't make it into the primary. I poured it into a jar (unsanitized), added a little water, and pitched the dregs from the yeast pack. Maybe I'll get a picobrew out of it. It was already active after just a few hours.
The wort is quite bitter. There is some hop aroma but it's not a blast in the face or anything. I believe that much of the aroma is transported to the snout via carbonation so it's probably inappropriate to draw any conclusions yet. There is definitely a flavor I have not experienced in a wort before and I'd say it's something close to the aroma of the fresh hops, perhaps a little vegetal. I'm not sure I'd say grassy, though, which is one description I've heard of fresh hops ales. I think I'm going to like this!
Update: 24 hours later I still wasn't seeing any bubbling, but I did notice a strong (and delicious) hoppy aroma in the vicinity. Realizing that I'd first noticed it much earlier in the day I inspected the stopper and found it to be loose. Jammed it in and the blowoff tube began bubbling immediately and continuously. The temperature is holding at 68 degrees. The picobrew jar has a thick layer of krausen.
Update: After a week, racked to the secondary/bottling bucket. Gravity is 1.015 and bubbling is very infrequent. I'm hoping it will clarify considerably in the next week. There's not a particularly strong hop aroma but perhaps that will become evident once carbonated. I'm quite pleased with the overall flavor at this point, though, and the body is really nice. I'll be a bit disappointed if the aroma hops don't make an appearance, but it's likely to be a nice pale in any event.
I think this is the first time I've used a bottling bucket as a secondary. This lets me take gravity samples easily and safely through the spigot and since it's off the trub they should be clean. No racking and less cleaning on bottling day will be a nice convenience.
Update: Final gravity on 10/29 before bottling is 1.014 for an apparent attenuation of 72%. Tastes excellent. Very smooth, good body, nice bitterness, a little sweetness. I'd say it mainly exhibits the expected characteristics of warmer fermentation with this yeast. Still not a particularly hoppy nose. Clarified pretty well, but the sample is from the bottom of the secondary and I'm sure it will be crystal clear in bottles.
Here's an interesting article and slide show from the NY Times about fresh hops beer and a hops farm in Salem, Oregon.
I looked to Palmer's American Pale Ale recipe from How To Brew as a starting point, as well as the Sierra Nevada Pale Ale clone recipe from BYO's May/June 2005 issue.
I probably would have gone with the recommended Wyeast American Ale if The Cellar hadn't been out. Instead I got Wyeast yeast strain 1272, American Ale II, described thusly:
With many of the best qualities that brewers look for when brewing American styles of beer, this strain’s performance is consistent and it makes great beer. Fruitier and more flocculent than Wyeast 1056 American Ale yeast, slightly nutty, soft, clean with a slightly tart finish. Ferment at warmer temperatures to accentuate hop character with intense fruitiness, or ferment cool for clean, light citrus character. Expect good attenuation, but this will vary with grist makeup, mashing protocol, or other wort characteristics. Reliably flocculent, producing bright beer without filtration.Flocculation is high, attenuation is 72 - 76%, and temperature range is 60F - 72F.
The recipe I ended up with for a 5.5 gallon batch was:
- 6 pounds light liquid malt extract (The Cellar's house brand)
- 1 pound Briess Pilsen light DME
- 1 pound 2-row malt
- 1 pound crystal 40 malt
- 1 ounce Northern Brewer hops, 8.5 AA, 65 min
- 4.1 ounces fresh (wet) Centennial hops, 35 min (AA unknown)
- 4.1 ounces fresh (wet) Centennial hops, 15 min (AA unknown)
- 2.8 ounces fresh (wet) Cascade hops, 5 min (AA unknown)
- Wyeast 1272, American Ale II liquid yeast
This is a little heavier on the bittering hops than Palmer's recipe, which would have called for about .65 ounces of Northern Brewer after AA adjustment.

I steeped the grains for 30 minutes, starting at 170 degrees and ending at 156, in 3 gallons. I see from Palmer, page 136, that it's best to have no more than a gallon per pound, so I should have used only 2 gallons.

Refilled the kettle to 3 gallons, added the DME at 200 degrees, brought to boil, and added the bittering hops.

At 30 minutes, added the Centennial. At 45, added the LME and returned to boil. I brought the container of LME up to something over 150 degrees in a hot water bath to minimize the recovery time. At 50 minutes, added more Centennial. At 60, added Cascade. Knockout at 65 and into icy sink where I removed the hop boiling bags.

Cooled to about 90 degrees, aerated by pouring between kettle and fermenter three times, and topped off with refrigerated Crystal Geyser spring water. Mixing of wort and water was very poor, so poured off about 4 gallons into the kettle and back to the fermenter, which did the trick. Temperature was 71 degrees and volume was 5.5 gallons.
Original gravity was measured at 1.052, smack in the middle of Palmer's range of 1.045 to 1.060. That agrees very well with the calculated gravity using 22 points from the steeped crystal, 42 from the DME, and 216 from the LME, or 50.91 points per gallon, or 1.051 gravity.
Pitched the yeast and transported to the downstairs bathroom where I think it will stay at the lower end of the temperature range. After seven hours it was down to 68 degrees, with no noticeable activity.
Next time, I need to drain the hops bags into a sanitized bowl. There was 8 or 12 ounces of wort that didn't make it into the primary. I poured it into a jar (unsanitized), added a little water, and pitched the dregs from the yeast pack. Maybe I'll get a picobrew out of it. It was already active after just a few hours.
The wort is quite bitter. There is some hop aroma but it's not a blast in the face or anything. I believe that much of the aroma is transported to the snout via carbonation so it's probably inappropriate to draw any conclusions yet. There is definitely a flavor I have not experienced in a wort before and I'd say it's something close to the aroma of the fresh hops, perhaps a little vegetal. I'm not sure I'd say grassy, though, which is one description I've heard of fresh hops ales. I think I'm going to like this!
Update: 24 hours later I still wasn't seeing any bubbling, but I did notice a strong (and delicious) hoppy aroma in the vicinity. Realizing that I'd first noticed it much earlier in the day I inspected the stopper and found it to be loose. Jammed it in and the blowoff tube began bubbling immediately and continuously. The temperature is holding at 68 degrees. The picobrew jar has a thick layer of krausen.
Update: After a week, racked to the secondary/bottling bucket. Gravity is 1.015 and bubbling is very infrequent. I'm hoping it will clarify considerably in the next week. There's not a particularly strong hop aroma but perhaps that will become evident once carbonated. I'm quite pleased with the overall flavor at this point, though, and the body is really nice. I'll be a bit disappointed if the aroma hops don't make an appearance, but it's likely to be a nice pale in any event.
I think this is the first time I've used a bottling bucket as a secondary. This lets me take gravity samples easily and safely through the spigot and since it's off the trub they should be clean. No racking and less cleaning on bottling day will be a nice convenience.
Update: Final gravity on 10/29 before bottling is 1.014 for an apparent attenuation of 72%. Tastes excellent. Very smooth, good body, nice bitterness, a little sweetness. I'd say it mainly exhibits the expected characteristics of warmer fermentation with this yeast. Still not a particularly hoppy nose. Clarified pretty well, but the sample is from the bottom of the secondary and I'm sure it will be crystal clear in bottles.
Monday, October 4, 2010
baked Scotch eggs
I had Scotch eggs once, years ago, probably at a restaurant in Victoria. Unlike the fine people of Scotland I don't regard deep frying to be the apotheosis of cooking methods, but a breaded, sausage-wrapped hard-cooked egg hurled into boiling oil is indeed heart-stoppingly delicious.
Deep frying really doesn't seem necessary, though. I thought I'd attempt to make them in the oven.
I like baking eggs rather than boiling them. 30 minutes at 325 degrees is just right. The yolks become exceptionally creamy and it's much easier to hard-cook a dozen or two eggs this way than it is to boil or steam them.
I used a mild Italian bulk sausage mixed with a handful of minced onion and chives. I patted a couple ounces of sausage into a thin oval, dredged a wet egg in flour, and packed the meat around the egg. After being bathed in raw egg beaten with Dijon mustard, the egg was rolled in panko bread crumbs.

They rested on a cookie sheet in the refrigerator for a couple of hours, then went into a cold oven set to 350 degrees. After about 35 minutes I turned on the broiler for a few minutes to brown the bread crumbs.
The only problem was that the sausage split on most of them. I really didn't use a thick enough coating. I'd purchased only a pound of sausage and that just wasn't enough for eight eggs. Three ounces per egg would probably do the trick.

Despite this aesthetic glitch, the boys and I were quite pleased. The breading was crisp and not at all greasy, and the flavors and texture were just what I was looking for. And baking is so much more convenient than deep frying. I think I'll be trying this again.
Friday, October 1, 2010
Brother Juniper's wild rice and onion bread
I just got the updated edition of Peter Reinhart's Brother Juniper's Bread Book: Slow Rise as Method and Metaphor. I've only skimmed it, liking very much what I've seen, but I did take a stab at the recipe for wild rice and onion bread.
Rather than wild rice I used leftover red jasmine rice, and I also chose the fresh onion variation rather than dried. Executive summary: fantastic!

It's slightly sweet, nicely oniony, very tender, and when freshly baked had a superb crackly crust.

Ingredients:
All the dry ingredients are mixed and then liquids added. I kneaded it in the KitchenAid for about 8 minutes. With this much yeast and sugar it rises aggressively. The first rise was an hour. I formed two loaves and let them rise for another hour. Baking time at 350 degrees was close to an hour. Because the dough contains brown sugar and buttermilk it's important to bake at a lower temperature or the crust will scorch.
Rather than wild rice I used leftover red jasmine rice, and I also chose the fresh onion variation rather than dried. Executive summary: fantastic!

It's slightly sweet, nicely oniony, very tender, and when freshly baked had a superb crackly crust.

Ingredients:
- 4 cups bread flour
- 4 cups AP flour
- 1 cup diced onion
- 1/3 cup brown sugar
- 2.5 tablespoons active dry yeast proofed in 4 tablespoons water
- 1.5 tablespoons salt
- 1 cup cooked red jasmine rice
- 1/3 cup buttermilk
- 1.5 cups water
All the dry ingredients are mixed and then liquids added. I kneaded it in the KitchenAid for about 8 minutes. With this much yeast and sugar it rises aggressively. The first rise was an hour. I formed two loaves and let them rise for another hour. Baking time at 350 degrees was close to an hour. Because the dough contains brown sugar and buttermilk it's important to bake at a lower temperature or the crust will scorch.
This is a good way to use leftover rice. I'd like to try it with a wild rice blend to see how it differs, but the red jasmine rice is also very flavorful, nutty, and firm. I wonder how the recipe would take to a doubling of the rice.
Saturday, April 3, 2010
potato garlic white bread

Ingredients:
- 1 packet active yeast
- 18 grams Morton's kosher salt
- 2 cups water
- 150 grams baked russet potato with skin, cut into 1/4 inch dice
- 12 grams minced (pressed) garlic (a few cloves)
- 650 grams unbleached bread flour
It was a fairly wet dough but not too tough to work into shape. Let rise for an hour, punched down, reshaped. It was sticky enough that it suffered some damage as I tore off parchment paper and plastic. Should have let rise on a heavily floured counter, and heavily floured the top before covering.

It proofed for 2.25 hours, and was very pillowy but resilient. I was getting worried about having not let it rise long enough, and proofing too long, so I rushed it into a 500 degree oven onto a stone that had preheated for only 30 minutes. Added .5 cup water for steam and turned down to 450.
I tried a new slash shape and technique, using an X and a shallow cut at 45 degrees. The dough did not deflate, to my relief, so if it was overproofed it wasn't by much. It had good oven spring and the grigne opened pretty nicely.
Baked for 30 minutes and removed at about 195 degrees internal temperature, after which it coasted to 199.

The crust was just slightly reddish, perhaps indicative of overproofing and too much conversion of starches to sugars on the skin. It deflated a bit as it cooled and felt very soft beneath the leathery crust.
As bread, it's great. Superb texture, stretchy and tender, moist, and solid white bread flavor. As far as realizing my vision, it's kind of a miss. The potato flavor is present but subtle. I was hoping for noticeable tidbits of potato, too. And the garlic got lost somewhere along the way. The crust has a slight burnt note that I'd try to lose, perhaps by baking at a lower temperature but on a very hot stone, or proofing for a shorter time.

Next time I'd probably double the amount of potato and at least triple the garlic. The garlic might work better if it were coarsely chopped rather than pressed. Potato should also be a larger dice. Doubling the potato might call for reducing the water slightly. I think it should perhaps have a longer first rise and shorter proofing. Need to do some reading about this.
Bottom line, it's a keeper as a basic idea but needs some tweaking to achieve the desired result.
Sunday, March 28, 2010
first try at a ginger beer
Based on this ginger beer how-to I set out to make my first ginger beer. I simplified and modified the recipe a bit, and also doubled it to produce two gallons.

In three quarts of water I boiled for 30 minutes a cup of shredded/pulped ginger, 16 tablespoons of lemon and orange juice, and a cup of white sugar. It should have been two cups, I realized later.

I strained into five quarts of cold water, cooled in an ice bath to 80 degrees, and pitched half a teaspoon of Muntons ale yeast proofed in 3/4 cup of water.
It went into four two liter bottles. Upon sampling I was surprised by its lack of sweetness. That is when I realized that I forgot to double the sugar. I added 1/4 cup of corn sugar to each bottle, but did not taste again or take any gravity readings.

I think the flavor has more lemon than ginger character. It could just be that my ginger sensor is a little blown out right now since I was nibbling on it raw.
It's now resting at room temperature. I think I'll probably test one, two, three, and four days of fermentation.
2010-03-30 update:
All bottles were rock-hard in less than a day. The first bottle went into the refrigerator after 24 hours at room temperature. The second went in after 48.
The first two are pretty comparable. Carbonation is stronger in the second, and it may be just slightly more dry. I think I pick up the slightest hint of yeast and a touch more ginger bite in number two. All of those differences could be the effect of the effervescence, but they result in number two being more successful.
It's really pretty good. I don't detect any of the orange juice. The lemon is strong; I'd actually dial it back a bit and try the lime of the original recipe. It's far, far less sweet than the commercial ginger beer I have had most recently, Reed's Ginger Beer, which is so cloying as to make me queasy.
I don't think the degree of carbonation can actually increase much, so the next two bottles should give me a pretty good read on how the sweetness changes.
I wouldn't say that I can detect any amount of alcohol. A half cup of table sugar and a half cup of corn sugar per gallon gives an original gravity of only about [(3.5 oz 46 ppg + 3.5 oz x 42 ppg) x 1 lb / 16 oz], or 1.019. Even if it attenuated completely it would be less than 2.5% ABV, and I'm sure it will be less in actuality. This stuff should be only 80 - 90 calories per pint -- that's compared to 145 in 12 ounces of Reed's. This is quite a nice light summer drink.
2010-03-31 update:
Added number three to the tasting tonight. Absolutely massive carbonation, demanding several minutes of bottle opening ministrations. It wasn't quite chilled. One effect of this is that it kicks up all of the sediment, which probably affects the result.
That said, I don't actually notice much difference between two and three. Possibly a bit more dry. I'll have to try again tomorrow when both are equally cold. Number one is not entirely flat, but it's close to lifeless. Definitely dominated by the others.
I bought a bottle of Reed's Extra Ginger Brew. Bleah. It's like syrup compared to mine.
2010-04-02 update:
Tasting number four completed the flight. I compared to number two and it is assuredly drier. I measured the gravity of both. With temperature adjustment, number two was 1.014 and number four was 1.011. I don't know that I have a preference. Assuming that my original gravity estimate is correct, that would be about 1% ABV, or nothing to worry about if the boys want some.
I think it's pretty easy to experiment with the recipe in very small amounts. Unlike beer, I don't think that any yeast strain I'm likely to use is going to make much of a difference. Starting with a base of ginger and sugar it should be easy to incrementally add ingredients until reaching something that seems worth upscaling and bottling.
Thursday, March 18, 2010
simple crusty beer bread
I saw this recipe for a partial whole wheat modification of this no-knead simple crusty bread from the Artisan Bread in Five Minutes a Day book. I thought I'd touch it up a bit with some beer and vinegar, along the lines of the Cook's Illustrated almost no-knead modification.
Here are the goods:
Baked a loaf the next day. Let the dough ball rise for a little under an hour, slashed fairly deeply, then baked on a stone at 450 degrees for 30 minutes, with a steam tray.

Wonderful! The oven spring was proportionally greater than I've ever seen. The small loaf remained dense, at nearly 20 ounces, but with a tender crumb and good crust. We had it for dinner while still warm and it was excellent. I would try 35 minutes next time. Should try slashing in a way that lets it open up even more, too. And I'll bet the fraction of whole wheat could be increased.

The presence of beer was more evident than in any bread I've made, contributing a superb yeasty flavor without any of the cloying sweetness that I think I've detected the times I've used Budweiser. The Cerveza Caguama, a light lager from El Salvador, is something I bought for a party where I suspected Corona drinkers to be present. It looks and tastes about the same, although notably skunkier. It is paradoxically tolerable when intolerably cold, but this bread is a much better use for it.
2010-03-19 update: I baked another loaf today and gave it a central slash and about four more curving ones on each side. It worked even better, and looked like an armadillo! I may have to do something with that theme.
Here are the goods:
- 1.5 tablespoons Morton kosher salt
- 1.5 tablespoons active yeast
- 2.5 cups warm water
- .5 cup beer (Cerveza Caguama)
- 2 tablespoons white distilled vinegar
- 340 grams white whole wheat flour
- 635 grams all purpose flour
Baked a loaf the next day. Let the dough ball rise for a little under an hour, slashed fairly deeply, then baked on a stone at 450 degrees for 30 minutes, with a steam tray.

Wonderful! The oven spring was proportionally greater than I've ever seen. The small loaf remained dense, at nearly 20 ounces, but with a tender crumb and good crust. We had it for dinner while still warm and it was excellent. I would try 35 minutes next time. Should try slashing in a way that lets it open up even more, too. And I'll bet the fraction of whole wheat could be increased.

The presence of beer was more evident than in any bread I've made, contributing a superb yeasty flavor without any of the cloying sweetness that I think I've detected the times I've used Budweiser. The Cerveza Caguama, a light lager from El Salvador, is something I bought for a party where I suspected Corona drinkers to be present. It looks and tastes about the same, although notably skunkier. It is paradoxically tolerable when intolerably cold, but this bread is a much better use for it.
2010-03-19 update: I baked another loaf today and gave it a central slash and about four more curving ones on each side. It worked even better, and looked like an armadillo! I may have to do something with that theme.
Monday, March 15, 2010
one-minute ciabatta bread
How could I possibly pass up a one-minute ciabatta bread hack?
Before leaving for work:
Baked it in the evening for 25 minutes at 425 degrees on a baking stone, sprinkled top and bottom with a Tuscan herb mix. I also used a steam tray. The large greased bowl made pouring this wet dough onto a prepped pizza peel easy, so I achieved a pretty good shape and easily snapped it onto the stone.
Oven spring and crust formation were nice. It ended up nearly semicircular in profile.

It does take more than a minute, but taking all prep and cleanup into account it's probably no more than five, and that's quite excellent for this very palatable result. Really tender but chewy crumb, nice flavor, great with butter.

It probably could have baked for another five minutes. I'll try it with a higher protein flour next time, which I think would make the texture closer to other ciabattas (ciabatti?) I've had. As-is, though, it is quite worthy and would be an admirable sandwich bread.
Before leaving for work:
- 1/4 teaspoon active yeast stirred into
- two cups warm water
- 600 grams (about 4 cups) all-purpose flour
- 1 mounded teaspoon Morton kosher salt
Baked it in the evening for 25 minutes at 425 degrees on a baking stone, sprinkled top and bottom with a Tuscan herb mix. I also used a steam tray. The large greased bowl made pouring this wet dough onto a prepped pizza peel easy, so I achieved a pretty good shape and easily snapped it onto the stone.
Oven spring and crust formation were nice. It ended up nearly semicircular in profile.

It does take more than a minute, but taking all prep and cleanup into account it's probably no more than five, and that's quite excellent for this very palatable result. Really tender but chewy crumb, nice flavor, great with butter.

It probably could have baked for another five minutes. I'll try it with a higher protein flour next time, which I think would make the texture closer to other ciabattas (ciabatti?) I've had. As-is, though, it is quite worthy and would be an admirable sandwich bread.
Sunday, January 31, 2010
getting started with Healthy Bread in Five Minutes a Day
For Christmas Tracey gave me Healthy Bread in Five Minutes a Day. I don't have the authors' first book, Artisan Bread in Five Minutes a Day, but I was familiar with the basic technique: make a large batch of a wet dough, store it in the refrigerator, and use it as needed for the next couple of weeks. A wet dough is the basic alternative to kneading because it gives the flour's gluten strands a way to align on their own rather than through laborious manual intervention. The downside is that wet doughs must be handled pretty carefully and are hard to shape.
I started with the first recipe, for the whole grain artisan free form loaf:
It rapidly doubled or tripled in size, at which point it refrigerated it. The next day I made two small loaves, one plain and one sprinkled with a dry Tuscan herb mix. I need a new and less broken pizza stone so this time I baked on a greased hollow-core cookie sheet.
This is the first time I've tried steam baking. Between two and three cups of ice cubes on a broiler pan provided steam for perhaps 25 minutes, but took a few minutes to get going. It would be better to give the ice a head start before inserting the loaves. I also tried hot tap water for subsequent loaves; I think this is superior as it produces steam almost immediately and is easier to quantify.
This dough spreads out quite a bit after being formed and resting for 90 minutes. I think my technique could have been better, resulting in a tighter loaf. However, oven spring was significant, as promised.

They baked at 460 for 30 minutes, which seemed about right. The crust is nicely crispy. Crumb was tender and not too dense. Flavor was a bit bland and undersalted, to my taste. This dough should develop sourdough characteristics over time, so a comparison in a few days will be interesting.

At five days I made another loaf. The refrigerated dough was weeping a bit, which is not a problem. This one came out pretty flat; I did not do a good job of shaping it or tucking the sides under. After 90 minutes of rising it was very wide and squat. The flavor was somewhat improved, I thought. Definitely needs salt.
The dough was six days old when I used the last of it. This time I floured the dough and my hands better and took more care in shaping the loaf while still doing it in under 20 seconds. More flour is a big help, and I think also helps the dough hold its shape while rising.
This time I baked for 20 minutes on the cookie sheet, then 10 minutes on the rack. The top crusts so far had been great, but with pallid bottoms. This helped a little, but what I really need is a new stone. In the meantime I should try rising on parchment paper and baking in the dutch oven.

The last loaf turned out the best although it was still irregularly shaped and proportioned. Tucking the sides completely and evenly may be the key to avoiding this, for even though the loaf initially looks perfectly symmetrical the manner in which it rises and springs reveals the internal inconsistencies. I'll have to try the letter-fold technique, too. Also, this loaf was a little larger (17 ounces after baking) and perhaps that causes it to collapse a bit under its own weight.

For the second dough I chose the 100% whole wheat with olive oil:
By this time I was getting a little better at shaping the loaves.

Because the loaf is supposed to be formed in only 20 to 40 seconds if there is a major malformation it's probably unwise to try to correct it.


The second loaf was better shaped and also small, at only 11 ounces baked. I baked it on parchment paper in a preheated dutch oven, uncovered. Oven spring was quite good. For a loaf that fits this is far better than a cookie sheet.

The third loaf was considerably larger at over 17 ounces baked and also fairly well shaped. And, my new baking stone had arrived. Oven spring was good, but I think the stone needed more preheating. It's much thicker than my old pizza stone.

For the fourth loaf I tried the garlic-studded baguette recipe. It was my first attempt at the letter-fold method and it did not go very well. For one thing, I should have made a smaller loaf; this one suffered quite a bit of abuse. For another, I tried using a pizza peel and even though it was liberally cornmealed the loaf offered considerable resistance to my dislodgement efforts. The result was unattractively irregular, to say the least. Also, I did not shove the garlic down deeply enough to keep it from popping out.

As for flavor, pretty uninspired. The garlic doesn't really contribute anything to any slice that doesn't have a piece.
So, what is my assessment at this point? The method is definitely low-effort. I can produce a pretty decent basic loaf and it really does require but five minutes of active effort on baking day. On the day it's baked the crust is excellent; after that it loses its crispness. (This may be a sign of slight underbaking, actually.) It has a relatively dense crumb. It keeps well for a couple of days or more. Flavor from these two basic recipes is underwhelming. I didn't think any sourdough flavors ever developed to a meaningful degree. It makes pretty tasty toast.
Will I keep doing this? Yes, I think I will. I'll keep working my way through the book and I'm sure some of the recipes will be more interesting. And at the very least this is a way to have fresh bread on any given day with very little effort and not too much wall time either.
I started with the first recipe, for the whole grain artisan free form loaf:
- 720 grams (5.5 cups) whole wheat flour
- 270 grams (2 cups) unbleached AP flour
- 15 grams (1.5 tablespoons) granulated yeast
- 15 grams (1 tablespoon) Kosher salt (calibrated for Morton's)
- 35 grams (1/4 cup) vital wheat gluten
- 900 grams (4 cups) lukewarm water
It rapidly doubled or tripled in size, at which point it refrigerated it. The next day I made two small loaves, one plain and one sprinkled with a dry Tuscan herb mix. I need a new and less broken pizza stone so this time I baked on a greased hollow-core cookie sheet.
This is the first time I've tried steam baking. Between two and three cups of ice cubes on a broiler pan provided steam for perhaps 25 minutes, but took a few minutes to get going. It would be better to give the ice a head start before inserting the loaves. I also tried hot tap water for subsequent loaves; I think this is superior as it produces steam almost immediately and is easier to quantify.
This dough spreads out quite a bit after being formed and resting for 90 minutes. I think my technique could have been better, resulting in a tighter loaf. However, oven spring was significant, as promised.

They baked at 460 for 30 minutes, which seemed about right. The crust is nicely crispy. Crumb was tender and not too dense. Flavor was a bit bland and undersalted, to my taste. This dough should develop sourdough characteristics over time, so a comparison in a few days will be interesting.

At five days I made another loaf. The refrigerated dough was weeping a bit, which is not a problem. This one came out pretty flat; I did not do a good job of shaping it or tucking the sides under. After 90 minutes of rising it was very wide and squat. The flavor was somewhat improved, I thought. Definitely needs salt.
The dough was six days old when I used the last of it. This time I floured the dough and my hands better and took more care in shaping the loaf while still doing it in under 20 seconds. More flour is a big help, and I think also helps the dough hold its shape while rising.
This time I baked for 20 minutes on the cookie sheet, then 10 minutes on the rack. The top crusts so far had been great, but with pallid bottoms. This helped a little, but what I really need is a new stone. In the meantime I should try rising on parchment paper and baking in the dutch oven.

The last loaf turned out the best although it was still irregularly shaped and proportioned. Tucking the sides completely and evenly may be the key to avoiding this, for even though the loaf initially looks perfectly symmetrical the manner in which it rises and springs reveals the internal inconsistencies. I'll have to try the letter-fold technique, too. Also, this loaf was a little larger (17 ounces after baking) and perhaps that causes it to collapse a bit under its own weight.

For the second dough I chose the 100% whole wheat with olive oil:
- 910 grams whole wheat flour
- 15 grams granulated yeast
- 15 grams kosher salt
- 35 grams vital wheat gluten
- 790 grams lukewarm water
- 110 grams olive oil

By this time I was getting a little better at shaping the loaves.

Because the loaf is supposed to be formed in only 20 to 40 seconds if there is a major malformation it's probably unwise to try to correct it.


The second loaf was better shaped and also small, at only 11 ounces baked. I baked it on parchment paper in a preheated dutch oven, uncovered. Oven spring was quite good. For a loaf that fits this is far better than a cookie sheet.

The third loaf was considerably larger at over 17 ounces baked and also fairly well shaped. And, my new baking stone had arrived. Oven spring was good, but I think the stone needed more preheating. It's much thicker than my old pizza stone.

For the fourth loaf I tried the garlic-studded baguette recipe. It was my first attempt at the letter-fold method and it did not go very well. For one thing, I should have made a smaller loaf; this one suffered quite a bit of abuse. For another, I tried using a pizza peel and even though it was liberally cornmealed the loaf offered considerable resistance to my dislodgement efforts. The result was unattractively irregular, to say the least. Also, I did not shove the garlic down deeply enough to keep it from popping out.

As for flavor, pretty uninspired. The garlic doesn't really contribute anything to any slice that doesn't have a piece.
So, what is my assessment at this point? The method is definitely low-effort. I can produce a pretty decent basic loaf and it really does require but five minutes of active effort on baking day. On the day it's baked the crust is excellent; after that it loses its crispness. (This may be a sign of slight underbaking, actually.) It has a relatively dense crumb. It keeps well for a couple of days or more. Flavor from these two basic recipes is underwhelming. I didn't think any sourdough flavors ever developed to a meaningful degree. It makes pretty tasty toast.
Will I keep doing this? Yes, I think I will. I'll keep working my way through the book and I'm sure some of the recipes will be more interesting. And at the very least this is a way to have fresh bread on any given day with very little effort and not too much wall time either.
Tuesday, December 22, 2009
excellent no-knead olive rosemary bread
I thought an olive rosemary bread would be nice for Christmas Eve so I looked back over some previous efforts. (Hey, a year into this blogging business and it gratifying to find that it's as helpful a reference as I'd hoped.)
This almost no-knead loaf using the Cooks Illustrated method was great aside from the flattish shape. I went with something close to it, but drier in keeping with the original CI recipe:
It rose well over the next two hours, then went into the covered dutch oven preheated on the bottom rack to 500 degrees. Lowered to 425 and baked for 30 minutes covered and 20 uncovered to 206 degrees internal.

Holy guacamole señors y señoritas, it's gorgeous. I can see that the technique of forming the loaf by pulling the dough from several directions into the middle and then using that seam as the base worked perfectly. That has been too difficult to do with other no-knead doughs. Letting it rise in a smaller skillet also worked well. And it bounced or sprang or whatever you call it in the oven better than any other bread I've baked.
Now, two hours of sweet torment listening to it softly crackle into coolness.
It's superb. This is the closest thing to perfection to ever come out of my oven. The crust is spectacularly flaky and crisp, the crumb is chewy and stretchy and soft, and the flavor is heavenly. I'm about to dislocate one shoulder patting myself on the back and the other lunging for another piece.

I can tell that I used dried rosemary. There's no textural problem, but the flavor is clearly that of the dried herb. I'll use fresh next time. I wouldn't mind more olives, either.
Other than that I don't know how it could be any better. Well, I suppose it could be, but I am totally satisfied with this outcome. Outstanding ROI. I'll probably make another.

This almost no-knead loaf using the Cooks Illustrated method was great aside from the flattish shape. I went with something close to it, but drier in keeping with the original CI recipe:
- 3 cups all purpose flour less 3 tablespoons
- 3 tablespoons wheat gluten
- 1.5 teaspoons salt
- rounded 1/4 teaspoon rapid rise yeast
- 1 cup plus 1 tablespoon water
- 1/4 cup plus 1 tablespoon goldenflower ale (homemade)
- 2 tablespoons apple cider vinegar (homemade)
- 1/2 cup chopped kalamata olives
- 1 tablespoon dried rosemary, lightly crushed
It rose well over the next two hours, then went into the covered dutch oven preheated on the bottom rack to 500 degrees. Lowered to 425 and baked for 30 minutes covered and 20 uncovered to 206 degrees internal.

Holy guacamole señors y señoritas, it's gorgeous. I can see that the technique of forming the loaf by pulling the dough from several directions into the middle and then using that seam as the base worked perfectly. That has been too difficult to do with other no-knead doughs. Letting it rise in a smaller skillet also worked well. And it bounced or sprang or whatever you call it in the oven better than any other bread I've baked.
Now, two hours of sweet torment listening to it softly crackle into coolness.
GOOOOOOOOOAAAAAAAAAAAAAAAL!
It's superb. This is the closest thing to perfection to ever come out of my oven. The crust is spectacularly flaky and crisp, the crumb is chewy and stretchy and soft, and the flavor is heavenly. I'm about to dislocate one shoulder patting myself on the back and the other lunging for another piece.

I can tell that I used dried rosemary. There's no textural problem, but the flavor is clearly that of the dried herb. I'll use fresh next time. I wouldn't mind more olives, either.
Other than that I don't know how it could be any better. Well, I suppose it could be, but I am totally satisfied with this outcome. Outstanding ROI. I'll probably make another.

Tuesday, December 15, 2009
french cooking in ten minutes
Edouard de Pomiane and his 1930 book French Cooking in Ten Minutes OR Adapting to the Rhythm of Modern Life are mentioned by Julian Barnes in The Pedant in the Kitchen. It's discussed at some length, actually, and sounded delightful to me. I have now read the translation by Philip and Mary Hyman and have been trying some recipes. It is indeed a wonderful little book.

Pomiane was an eminent medical doctor and researcher at the Pasteur Institute, not a professional chef. He was very much a food scientist, though, referring to this field as gastrotechnology. He was a renowned cooking lecturer, teacher, and radio host. He wrote twenty-two books on the art. Judging from this brief volume he was as entertaining as he was concise, and as philosophical as he was scientific.
And it's not just a collection of ten minute dishes. He has entire multi-course luncheon and dinner menus that can be prepared in ten minutes or so by a well-organized cook. (Of course he does not include the time it takes to boil water or heat oil, and allows for one dish to be finishing while its predecessor is being consumed.)
Here's how it begins:
Barnes mentions Tomato Soup as a dish that failed for him. It's the first one I tried. This is my paraphrase:
I've also made the Alsatian Dumplings and Whiting Boiled in Court Bouillon. Rather than whiting fish I used striped pangasius fillets. The court bouillon was made with a bay leaf, white vinegar, curry power, ground nutmeg, black pepper, and salt. Topped with lemon butter and bread crumbs the fish was excellent. The boys loved the dumplings, which I finished with just butter, salt, and pepper.
This book is a treasure trove of simple recipes and efficient methods. Great fun.

Pomiane was an eminent medical doctor and researcher at the Pasteur Institute, not a professional chef. He was very much a food scientist, though, referring to this field as gastrotechnology. He was a renowned cooking lecturer, teacher, and radio host. He wrote twenty-two books on the art. Judging from this brief volume he was as entertaining as he was concise, and as philosophical as he was scientific.
And it's not just a collection of ten minute dishes. He has entire multi-course luncheon and dinner menus that can be prepared in ten minutes or so by a well-organized cook. (Of course he does not include the time it takes to boil water or heat oil, and allows for one dish to be finishing while its predecessor is being consumed.)
Here's how it begins:
I dedicate this book to Madame X, asking for ten minutes of her kind attention.Heh.
Barnes mentions Tomato Soup as a dish that failed for him. It's the first one I tried. This is my paraphrase:
bring two cups of water to a boilI also added a sprinkle of tarragon. I didn't have any semolina so I ground couscous made of durum wheat. I suspect it wasn't ground finely enough, as the soup had the distinct texture of very small couscous. However, it was not an objectionable texture, it stayed in suspension, and the flavor was just fine. Just as good as any canned tomato soup I've ever had, really, and it probably cost ten cents!
stir in a heaping tablespoon of tomato paste
stir in two tablespoons of finely ground semolina
salt the soup
boil for six minutes
stir in four tablespoons of heavy cream
I've also made the Alsatian Dumplings and Whiting Boiled in Court Bouillon. Rather than whiting fish I used striped pangasius fillets. The court bouillon was made with a bay leaf, white vinegar, curry power, ground nutmeg, black pepper, and salt. Topped with lemon butter and bread crumbs the fish was excellent. The boys loved the dumplings, which I finished with just butter, salt, and pepper.
This book is a treasure trove of simple recipes and efficient methods. Great fun.
Wednesday, December 2, 2009
ginger beef wu-mu noodles
I was scouting for interesting Asian stuff at the 99 Ranch and picked up a four pound box of Wu-Mu dry noodles for a few bucks. According to the ingredients list they are made of wheat flour, ice water, and salt. I couldn't find the ice water but perhaps I stored them incorrectly.
Engrish is my third favorite language!
I love it. Seriously, I greatly appreciate localization efforts. I hope the enstructured word usement of my software offers the same level of entertainment to its international users.
The noodles are great and cook in three minutes. I threw together a quick stir fry with leftover medium-rare strip steak, lots of fresh ginger, king oyster mushrooms, onion, sesame oil, soy sauce, fish sauce, and black vinegar. Worthy of being made again.
Engrish is my third favorite language!
Choiceness Grocery Nation Affirmation
We are the first company in Taiwan producing dried instant noodles meeting the GMP standard and its quality management system is ISO approved. It is non-fried and no preservatives. The quality is health and satisfaction. You can set your mind at ease, because we can safeguard you expenditure.
I love it. Seriously, I greatly appreciate localization efforts. I hope the enstructured word usement of my software offers the same level of entertainment to its international users.
The noodles are great and cook in three minutes. I threw together a quick stir fry with leftover medium-rare strip steak, lots of fresh ginger, king oyster mushrooms, onion, sesame oil, soy sauce, fish sauce, and black vinegar. Worthy of being made again.
Sunday, September 20, 2009
first attempt at making biltong
Biltong is a South African cured meat, originating with Dutch settlers who needed a way to preserve big slabs of game. It's marinated in vinegar and spices then hung to dry for several days. There are many recipes and techniques varying quite a bit in the type of vinegar, quantity of salt and sugar, presence of other spices, stages of application and marination, curing method, and curing time.
For my first attempt I drew upon three main sources and concocted my own amalgamation of the three.

Rather than separating the wet and dry marination processes I went with the simpler approach of producing a single wet marinade. I used:

They went straight into a zip lock bag with the marinade where I massaged them and sucked out all the air.

They marinated for about 19 hours. I rinsed them in a solution of vinegar and water, taking off most of the coriander seeds.

I boiled and threaded wire through each piece and hung them in my hacked together biltong dryer. The dryer maintains a temperature of 110 to 140 degrees. After 22 hours this is how they looked.

After 24 hours I took a sample from the bottom of a tri-tip and a sirloin. The thin piece of tri-tip was fairly dry and firm and very chewy, although not difficult like a rock hard piece of jerky. The flavor was a really nice tang complemented well by the coriander. The sirloin, obviously much less thoroughly cured and extremely tender, also had a strong beefy flavor. I don't think the sirloin is quite ready, and probably the tri-tip isn't either in the thicker parts.

I'm not sure yet how long I'll let these go. Another day, for sure. This article, which I found only later after looking for photos of sliced biltong to gauge the color, notes that the moisture content is a matter of personal preference. I don't know if there are spoilage concerns with more moisture but that seems like a possibility. They aren't like a cured ham with a thick layer of protective gunk.
For my first attempt I drew upon three main sources and concocted my own amalgamation of the three.
- http://www.wikihow.com/Make-Biltong-(South-African-Beef-Jerky)
- http://chowhound.chow.com/topics/398671
- http://www.markblumberg.com/biltong.html

Rather than separating the wet and dry marination processes I went with the simpler approach of producing a single wet marinade. I used:
- 1 cup white vinegar
- generous 1/2 cup Balsamic vinegar
- 2 heaping tablespoons brown sugar
- 1 teaspoon ground black pepper
- scant 2 tablespoons coarse sea salt
- 1/3 cup crushed coriander seeds (Indian)

They went straight into a zip lock bag with the marinade where I massaged them and sucked out all the air.

They marinated for about 19 hours. I rinsed them in a solution of vinegar and water, taking off most of the coriander seeds.

I boiled and threaded wire through each piece and hung them in my hacked together biltong dryer. The dryer maintains a temperature of 110 to 140 degrees. After 22 hours this is how they looked.

After 24 hours I took a sample from the bottom of a tri-tip and a sirloin. The thin piece of tri-tip was fairly dry and firm and very chewy, although not difficult like a rock hard piece of jerky. The flavor was a really nice tang complemented well by the coriander. The sirloin, obviously much less thoroughly cured and extremely tender, also had a strong beefy flavor. I don't think the sirloin is quite ready, and probably the tri-tip isn't either in the thicker parts.

I'm not sure yet how long I'll let these go. Another day, for sure. This article, which I found only later after looking for photos of sliced biltong to gauge the color, notes that the moisture content is a matter of personal preference. I don't know if there are spoilage concerns with more moisture but that seems like a possibility. They aren't like a cured ham with a thick layer of protective gunk.
Tuesday, September 8, 2009
mom's Ukrainian-style borscht

Courtesy of Ukraine Trek comes this description of borscht:
But especially known and most favorite dish all over the world is famous Ukrainian borsch. Borsch is cooked of the fresh vegetables: cabbage, beet, tomato with the addition of pounded lard with garlic and parsley. The combination of all these groceries give the borsch its piquancy, aroma and unforgettable taste. There are about 30 types of Ukrainian borsch (Poltava borsch, Chernigov borsch, Kiev borsch, Volyn borsch, Lviv borsch and others).
Here's mom's recipe. It lacks a few things like lard, goose fat, and garlic that I've seen in some recipes. I made the beef stock from scratch. I chose to omit the carrots because I just don't like them that much in soup. I added minced garlic near the end per this recipe, as well as fresh dill. I served it with parsley and sour cream.
Simmer 30 minutes, covered:
- 1 pound beef chuck
- 8 cups beef broth
- salt, pepper, bay leaf
Melt 2 tablespoons butter in a 6 quart kettle. Add and saute 5 minutes:
- 1 medium onion, chopped
- 2 carrots, sliced
- 1 stalk celery, diced
- 4 medium raw beets, in strips
- 1/2 medium cabbage, shredded
- 4 medium potatoes, cubed
Add 1 6 ounce can tomato paste and 1 tablespoon vinegar. Simmer 10 minutes. Add meat and broth. Simmer 1 1/2 hours. Serve with sour cream, lemon slices, parsley or dill.
For the stock I referred to the recipe in The New Best Recipe cookbook. I had two pounds of soup bones but had only a pound of chuck rather than the four it calls for. I also didn't have any red wine on hand to reduce so I used a bit of Worcestershire sauce.
As with all Cook's Illustrated recipes the experimentation and food science behind the final recipe is interesting. It takes far more beef to produce a meaty stock than chicken for several reasons: chicken flavor compounds are very strong, it's the Maillard reactions that deliver a lot of what we think of as the beefy flavor (contrast boiled beef), chicken skin and fat taste like chicken while beef fat is rich but not beefy, and chicken bones and marrow contribute chicken flavor while beef marrow contributes body but not much flavor and beef bones taste like bones.

So, my stock ended up being not as rich as it should have been but I wasn't disappointed.

A less starchy potato than would have held up a little better, but the Yukon Golds were fine. The beets were fresh from the garden and very nice.

The result was great! I suppose this must be one of my comfort foods. The boys and I enjoyed several steaming bowls while watching football on a drizzly, dreary evening. I thought the beef flavor was perfectly adequate. The beet flavor was prominent. Overall it's a magnificent combination of sweet and savory with enough richness from the stock and sour cream to be satisfyingly filling.

Cold the next day it was just as good, and perhaps even better. It was apparent, though, that I could have skimmed the fat from the stock more thoroughly. The texture wasn't ideal due to the small fat granules. Letting the stock cool enough to skim it well would have added quite a bit of time to the preparation. Maybe a solution is to let it sit for 15 minutes or so, skim enough liquid to get the fat along with some stock, and pop that into the freezer. The hot stock could be used immediately then reunited with the small amount of cold stock after the fat had been removed.
Monday, September 7, 2009
delicious blanched spinach and tomatoes
I've been experimenting with boiling ribs before grilling them, after talking to brother Matt about his technique. I did this the other day with a rack of pork ribs and plain water. Upon removing the ribs I cast about for something to do with what I suspected to be a rather tasty pot of liquid.
The solution was to pack a steamer basket with baby spinach and blanch it for 15 or 20 seconds. I drained the spinach and tossed it with halved Roma grape tomatoes from the garden and a few twists of sea salt and cracked black pepper. Not overly greasy, but with just enough pork fat and succulent pig flavor to be startlingly delicious. It's very pretty, too. I'll have to take a photo next time.
The solution was to pack a steamer basket with baby spinach and blanch it for 15 or 20 seconds. I drained the spinach and tossed it with halved Roma grape tomatoes from the garden and a few twists of sea salt and cracked black pepper. Not overly greasy, but with just enough pork fat and succulent pig flavor to be startlingly delicious. It's very pretty, too. I'll have to take a photo next time.
Friday, August 14, 2009
marrow bones with basil and chive gremolata
I don't think I've had beef marrow more than once or twice since I was a kid. I bought four marrow bones the other day and roasted them tonight after reading this Chowhound thread.
I swept through the greenhouse and noticed that I had some spicy globe basil that needed pinching back so nabbed some of that along with chives and parsley. This made for something gremolata-like when combined with minced garlic, sea salt, cracked pepper, and lemon zest and juice.
I roasted the bones at 350 degrees for 24 minutes then ate the marrow on toasted whole wheat bread with the gremolata. Wow! Rich and delicious, and perfectly balanced by the citrusy zing. The slight sweetness of the whole wheat was excellent. I found myself utterly sated well before it was gone, which I have to say is unusual.
Definitely something to continue exploring.
Thursday, July 16, 2009
first bok choi
I think the bok choi all bolted the instant they sprouted. Rather than producing big heads with heavy stalks they are leggy and now adorned with pretty little yellow flowers. Tonight I figured I'd try them out anyhow and snipped a couple.
The leaf flavor is about normal. The lower part of the stalk is tough, but toward the top it is startlingly sweet. And the flowers are surprisingly tasty, not bitter as I expected.
I stir fried them, flowers and all, with a few other vegetables in sesame oil and a bit of butter, including king oyster mushrooms. I discovered those recently and can't get enough of them.

Tossed with miki noodles, and finished with seasoned rice vinegar and soy sauce. Not bad at all.

grilled curried swai
I had an itch for grilled fish so I swung by the HT Oak Tree Asian market to see what looked interesting. They had really big fat fillets of basa catfish at the counter, but when I asked for a couple I was directed toward the frozen packages in a nearby cooler. English is not the first language of any HT employee I've ever spoken with, but I think the deal was that she was doing me a favor by steering me toward some that were still frozen and were two to a package. They may also have been less expensive.
Well, they weren't as nice and thick as the ones that caught my eye, but looked like they'd do fine so I grabbed them. At home, upon closer inspection, I noticed that they weren't labeled basa after all. They were swai, or Pangasius hypophthalmus. Swai is also a southeast Asian catfish, and is frequently sold as basa. Those two wikipedia links, as well as this Basa buyer's guide, have some interesting history about the "catfish wars" and fish counterfeiting.
In any event, I cut up the fillets, marinated them for 90 minutes in a curry sauce, and skewered them.

The grill wasn't as clean as it should have been so I lost some tasty bits, but they turned out decently. It's a very mild fish, of course, and I thought the combination overall was excellent.

I used a similar marinade for grilled chicken thighs the other night. Very, very good. The ingredients are:
- mayonnaise
- enough olive oil to thin it a bit
- mild curry powder
- ground cumin seed
- minced garlic
- cracked black pepper
- salt
Saturday, May 30, 2009
no-knead olive rosemary pan bread
I attempted the no-knead no-transfer experiment with an olive rosemary bread. Liquid was eight ounces of beer, two tablespoons of vinegar, and the water used for proofing two packets of yeast with sugar. I took the salt down to a teaspoon and a half. It was a wet dough and looked small in the big dutch oven.

After rising for two hours in the oven with the light on (and door closed) it was quite gaseously immense. I left the door cracked after this.

By morning I think the waves of dough had receded a bit.

I set the oven for 500 with the dough inside, and baked for 30 minutes covered. That is, no preheating of anything. It clearly contracted during this time.

It baked for another 20 uncovered. The decrease in size was significant.

So I ended up being disappointed that the volume was not retained. For whatever reason, the structure is just not quite there. I wonder if there's any way to end up with something as pillowy as it was after the first two hours.

However, the bread was pretty darn good. The crust wasn't quite as flavorful as what I've had using a preheated dutch oven, but it was still very tasty. The "bread finger" form factor is kind of fun, and since the crust is decent it's nice to get it in every bite. The crumb was soft and stretchy. Everyone liked it.

I'd use more rosemary next time. This had perhaps a little more than a tablespoon.
Subscribe to:
Posts (Atom)