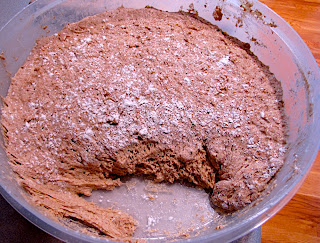
I started with the first recipe, for the whole grain artisan free form loaf:
- 720 grams (5.5 cups) whole wheat flour
- 270 grams (2 cups) unbleached AP flour
- 15 grams (1.5 tablespoons) granulated yeast
- 15 grams (1 tablespoon) Kosher salt (calibrated for Morton's)
- 35 grams (1/4 cup) vital wheat gluten
- 900 grams (4 cups) lukewarm water
It rapidly doubled or tripled in size, at which point it refrigerated it. The next day I made two small loaves, one plain and one sprinkled with a dry Tuscan herb mix. I need a new and less broken pizza stone so this time I baked on a greased hollow-core cookie sheet.
This is the first time I've tried steam baking. Between two and three cups of ice cubes on a broiler pan provided steam for perhaps 25 minutes, but took a few minutes to get going. It would be better to give the ice a head start before inserting the loaves. I also tried hot tap water for subsequent loaves; I think this is superior as it produces steam almost immediately and is easier to quantify.
This dough spreads out quite a bit after being formed and resting for 90 minutes. I think my technique could have been better, resulting in a tighter loaf. However, oven spring was significant, as promised.
They baked at 460 for 30 minutes, which seemed about right. The crust is nicely crispy. Crumb was tender and not too dense. Flavor was a bit bland and undersalted, to my taste. This dough should develop sourdough characteristics over time, so a comparison in a few days will be interesting.
At five days I made another loaf. The refrigerated dough was weeping a bit, which is not a problem. This one came out pretty flat; I did not do a good job of shaping it or tucking the sides under. After 90 minutes of rising it was very wide and squat. The flavor was somewhat improved, I thought. Definitely needs salt.
The dough was six days old when I used the last of it. This time I floured the dough and my hands better and took more care in shaping the loaf while still doing it in under 20 seconds. More flour is a big help, and I think also helps the dough hold its shape while rising.
This time I baked for 20 minutes on the cookie sheet, then 10 minutes on the rack. The top crusts so far had been great, but with pallid bottoms. This helped a little, but what I really need is a new stone. In the meantime I should try rising on parchment paper and baking in the dutch oven.
The last loaf turned out the best although it was still irregularly shaped and proportioned. Tucking the sides completely and evenly may be the key to avoiding this, for even though the loaf initially looks perfectly symmetrical the manner in which it rises and springs reveals the internal inconsistencies. I'll have to try the letter-fold technique, too. Also, this loaf was a little larger (17 ounces after baking) and perhaps that causes it to collapse a bit under its own weight.
For the second dough I chose the 100% whole wheat with olive oil:
- 910 grams whole wheat flour
- 15 grams granulated yeast
- 15 grams kosher salt
- 35 grams vital wheat gluten
- 790 grams lukewarm water
- 110 grams olive oil
By this time I was getting a little better at shaping the loaves.
Because the loaf is supposed to be formed in only 20 to 40 seconds if there is a major malformation it's probably unwise to try to correct it.
The second loaf was better shaped and also small, at only 11 ounces baked. I baked it on parchment paper in a preheated dutch oven, uncovered. Oven spring was quite good. For a loaf that fits this is far better than a cookie sheet.
The third loaf was considerably larger at over 17 ounces baked and also fairly well shaped. And, my new baking stone had arrived. Oven spring was good, but I think the stone needed more preheating. It's much thicker than my old pizza stone.
For the fourth loaf I tried the garlic-studded baguette recipe. It was my first attempt at the letter-fold method and it did not go very well. For one thing, I should have made a smaller loaf; this one suffered quite a bit of abuse. For another, I tried using a pizza peel and even though it was liberally cornmealed the loaf offered considerable resistance to my dislodgement efforts. The result was unattractively irregular, to say the least. Also, I did not shove the garlic down deeply enough to keep it from popping out.
As for flavor, pretty uninspired. The garlic doesn't really contribute anything to any slice that doesn't have a piece.
So, what is my assessment at this point? The method is definitely low-effort. I can produce a pretty decent basic loaf and it really does require but five minutes of active effort on baking day. On the day it's baked the crust is excellent; after that it loses its crispness. (This may be a sign of slight underbaking, actually.) It has a relatively dense crumb. It keeps well for a couple of days or more. Flavor from these two basic recipes is underwhelming. I didn't think any sourdough flavors ever developed to a meaningful degree. It makes pretty tasty toast.
Will I keep doing this? Yes, I think I will. I'll keep working my way through the book and I'm sure some of the recipes will be more interesting. And at the very least this is a way to have fresh bread on any given day with very little effort and not too much wall time either.


